Shop interior progress:
This week's focus was continuing to do some more shop props and narrative.
Post process volume change:
I briefly went over the post process volume before, but here is the post process transition in action.

You can tell when you move between 2 post process volumes, the exterior post process volume darkens the interior, whereas the interior one is a bit lighter with slightly different colours.
I first investigated post process blending after I found an example of this occurring in Hogwarts legacy - whereby, when you went from the outside to a room inside the castle, it got darker due to you being out of direct sunlight.

Here is an example I took within Hogwarts legacy - notice how when I leave and enter the tunnel the lighting changes (Most likely due to the blend radius of the post process volume)
You can tell this by the white vignette around the edges that disappears after you fully leave the tunnel. Furthermore, additional information to back up this point is the exposure and bloom that can be seen from the tunnel that disappears upon leaving the area.
For this example, it is used to enhance the darker space, but also to replicate the real life event where [once you step outside somewhere] the light causes a bright white light in your vision for a matter of seconds before you become accustomed to this new light.
Additional props:

Here are examples of my props within the scene, to save on texture memory, I grouped the smaller props into a UV sheet, for example the props you can see on the left shelf (except the sweet jars) were put onto 1 UV sheet.

I applied the same principle to the cakes, display case and 'finest cakes' bin - this way, grouping items together makes it easier to keep track of.

UV/Object grouping for texturing inside substance painter.


Pickup and item interaction:
For more player interaction, I thought it would be a cool idea to have items you could pick up for the player on the shop counter.
I achieved this by following part 2 of Matt Aspland's tutorial on item interaction - https://www.youtube.com/watch?v=q62hIj9sHi0

Much like the diary, I copied the code from part one of the video, but I just created a new BP class with the additional code inside it.

Troubleshooting problems:
- I have a secondary UI widget I can use on the BP class to change the text on screen to 'press E to interact and LMB or RMB to rotate' - I cannot put the new UI widget on the child blueprint class for some reason, so the current interaction prompt isn't final. Perhaps copying the Blueprint 1:1 caused this issue as it is retaining the same widget as the diary class (mainly because I didn't want the player to rotate the diary as I want them to look at it + I deleted the bottom faces for optimisation)
- Another issue I need to fix is when placing down items, if you don't put them in almost the exact same spot you picked it up, it either floats or clips under objects. I tried to counter this by enabling physics on the object, however, this causes objects to call down when they are picked up and the player is locked to that position until the simulation is unloaded and reloaded.
Vines:

I was recently given some more feedback for my work - one of these pieces of feedback was to decorate the far wall with the curved window bay. After discussion with lecturers and peers, we all agreed it would be a nice idea to put some more foliage in this area - therefore I decided to do some window baskets with some vines coming out of them.

Furthermore, I added a small piece of bunting here attached to the metal poles to breakup the brick behind it.
For clarification, I got the vine textures from the free png section of Raw png:

From these vine images I was able to create this atlas.

By pulling a plane over the atlas, I them warped them around the metal in order to get a natural look to them, as well as curving them and then subdividing them for use with cloth paint to apply the directional wind actor force to it.
Photogrammetry hessian sacks:
A while ago, I brought hessian sacks which I thought would be useful to ustilise in my level.

Here is a diagram I made of the process.
My first step was to take images of my sacks, I did this by filling the sacks with potatoes in order to retain the shape - putting the sack in different positions to hold its shape and also tying it back with an elastic bang to act as if it was tied with string. I took pictures of about 5 different subjects to use for a randomised asset.
After taking these pictures, I put them into substance sampler to create the 3D asset out of it - the UVs didn't matter in this case as the next step was to use a square image of the flat sack to put into substance sampler for use as a tiling texture.
After this stage, I put this texture into substance painter, where I added the newly created texture, then I put a tileable stitch on the side of the texture to use as a mesh decal.
I put the sacks inside of 3ds max and used the retopology modifier with the quadriflow mode in get the best edge flow possible for this retopology.
I then exported the sacks with the unwrapped UV as seperate objects before cloning them and adding them to my wheelbarrow to use as a hero asset/more focal asset.
When this was finished, I put this into unreal and started instancing them around the level.
And finally, put the wheelbarrow into marmoset toolbag to make final renders.
 |
| Example image from the data set |
 |
| Final render from marmoset of my cloth draped wheelbarrow and sacks |
 |
| Cloth Simulation in max with the wheelbarrow and box set as collision objects |
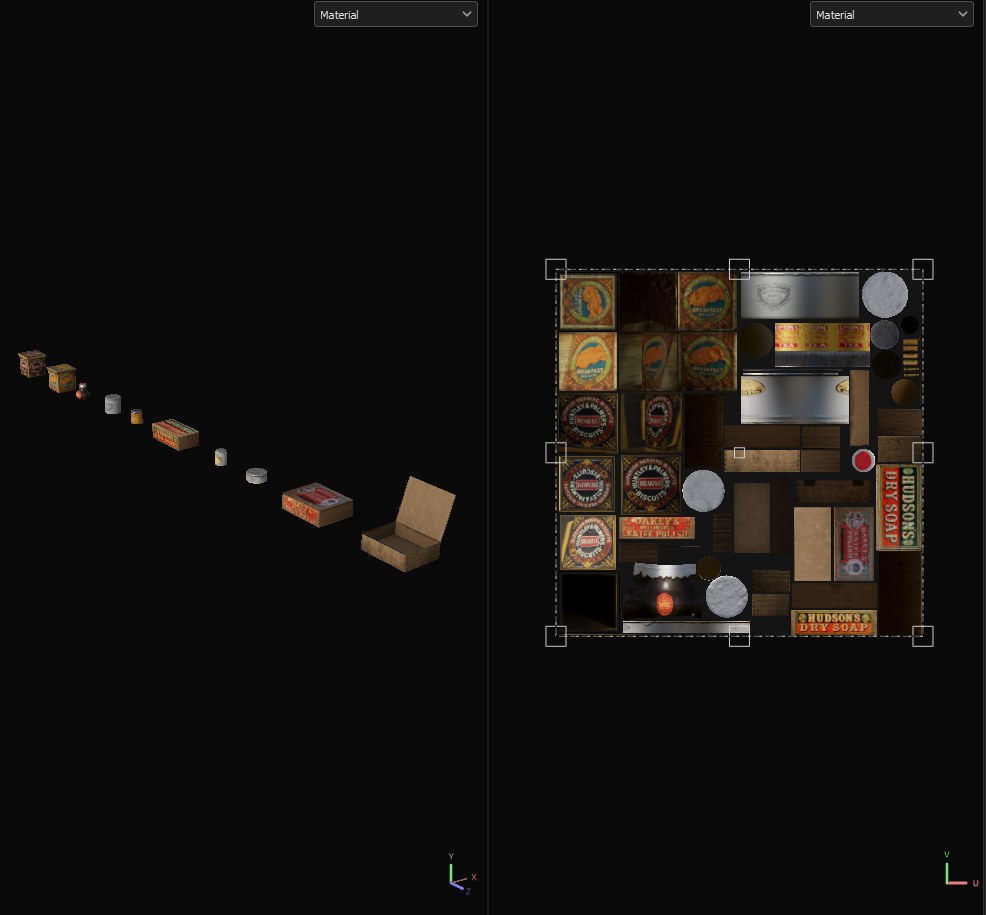
Further shop texturing:
To fill out the shop space further, I decided to texture some more shop goods - as it was difficult to find certain time accurate brands, I decided to make my own as well.
Using the advert for 'smith and jones relish and chutney' - I was able to create some additional props for the shop.

Here are some more samples of goods that are time period specific - although it must be noted that the Cadbury's tin is a replica of a victorian tin, which for me is good as I can get a higher resolution version of the image.

Here is the texture samples from substance painter - note the additions of the imagined brands.

Here is the smith and jones relish pot I made - to keep it in line and look period, I made the logo myself as well as made an alpha, of which I used tri-planar projection inside of substance painter in order to make it tile.
 |
| Alpha example |
Furthermore, I embossed the top with an alpha of the smith & jones logo based within the height channel.
No comments:
Post a Comment