Level Design Changes:
As part of the constant development of the level, I wanted to create a few changes.
One of these changes was to the general level design of the level.
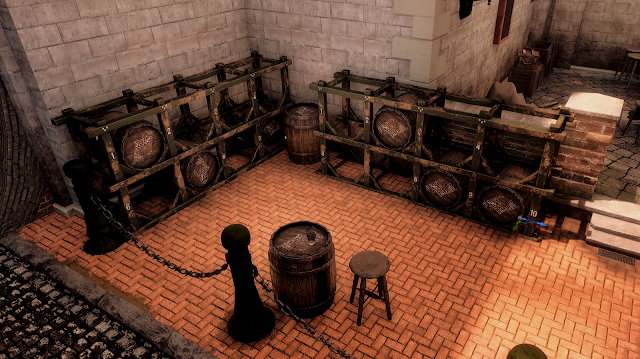
Highlighted in blue is already existing level design navigable paths for the player, but highlighted in red is a new level design path implemented.
A principle of level design/environment art is to push assets towards walls or boundaries as to not disrupt the flow of the level, so this new red path adds a new front to the areas in the level which can be investigated.
Audio and Narrative Story telling:
As part of some interactable features for my level, I wanted to do something unique.
For each table, there is a blueprint with a boundary collision box, when entering this collision box, the 'stand to listen' UI widget pops up on screen, which will prompt the player to stand still.
The intention of this is to play an audio file of an audio recording, this audio recording will take in to account the props on the table and tell a short audio snippet based on what props are on the table. It will drive the narrative of the scene and help people understand the backstories of what has happened in this space.
Originally, I wanted to have a 'press E to interact' function on the table, but this was a bit more complicated than anticipated. So in the end, I settled on a radius for the collision and audio sphere, just so it could not be spammed constantly, I made the audio have a delay on it, when walking up to the table you could listen to the audio by standing still,. but if you walked out the sphere radius, you would have to walk up to the table again and wait for the audio to re-activate.
 |
| Blueprint to activate UI widget via the collision box for the table |
I was able to achieve this by following Matt Aspland's Tutorial:
Reusable tiling texture workflow:
Every studio is different when it comes to making assets, but a common way to get the most use out textures to reduce draw calls is to reuse textures and have a higher geometry count to model certain details in.
In my case, I have a wood plank texture which I combined with several other wood normals, along with including an opacity map. I was able to re-use this texture accordingly on other assets.
 |
| Tiling wood plank texture |
I used the same texture on varying assets, including but not limited to:
- Wood boxes
- Wood Planks
- Wood damage on larger assets
Here are all the assets with the re-used texture.
In a similar vein, I utilised the trim sheet I made for the fence gate as well as the tiling green wood trim from my primary research library and I was able to put this on several assets.
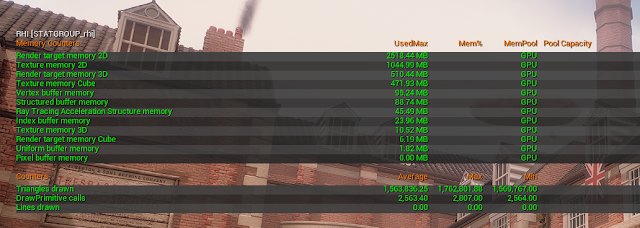
As of the current state of the level, the entire scene is pulling approx. 2.4k draw calls, I am hoping to get the draw calls below 4k by the time everything is finalised, including the interior.
As an environment artist, it is important to get material breakup so it adds age and believability to the level, so taking my already existing dirt decal atlas, I duplicated the planes around the level and added different material instances that control the opacity to make the dirt buildup look as accurate as possible..
 |
| Area with no decal atlas |
 |
| Area with decal atlas (Notice dirt buildup under barrel holders) |
It is my intention to go all around the level, walls and floor alike and add this decal atlas in order to make everything more grungy and old - the company was founded in the mid 1800s, so you would expect a factory that's over 50 years old to have some dirty buildups around different areas.
Interior texturing:
As the majority of the scene outside was complete, I thought the next best thing was to start working on the shop interior.
 |
| The wallpaper I used for the interior - By William Morris |
I continued to use assets I have available to me, such as reusing the wood for the boards on the wall. The floor is also a Photoscanned texture from my primary texture library.
The shop has a separate post process volume, as when I used the previous post process volume, it was too dark, so by unchecking the infinite extent and blending the outdoor and indoor post process volumes, I was able to equalise the colours, exposure and contrast for the interior.
When imagining the shop area, I imagined it as a 'convenience off license' type shop, as in the Victorian period, it was not uncommon to sell sweets and other goods with alcohol and that practice is still in use today.
It would be nice to unwrap as much as I can onto 1 UV sheet, including all the condiments, sweets, etc, in order to keep texture costs low.
For Further clarifications, for the hallways, I used the following wallpaper from TheFabricCo on Etsy - https://www.etsy.com/sg-en/listing/917932551/fd56577-987-56577-stripe-floral-mirage
Bunting Alpha Switches:
Recently I had some more feedback, I was told that the bunting in the level looked a bit too uniform, so I was told that it would be nice if I added some additional tears to the bunting in different places to randomise the effect.
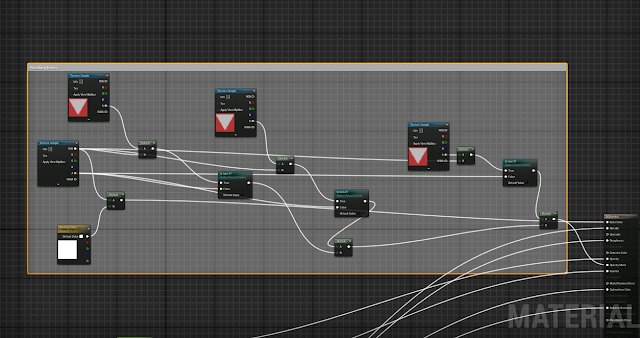
I achieved this by creating a static switch parameter inside of the material, this was connected to the Alphas of the tears. This logic was this: 'Is torn 'number'? - true is ticked' and all the false boxes were connected to the original bunting alpha making it triangular.
This principle could be applied to all colours of bunting, they were all put in different material instances where I could hue shift the colour via a constant 3 parameter.
Brick mask:
Some feedback I received was to do extra material breakup.
One of the things that was recommended was to change brick colours.
I created the mask in photoshop by overlaying the non-tiled brick texture on a canvas then painting over the bricks in red, green and blue respectively on random bricks in order to get it to look more organic. By then connecting the UV coordinate to tile the brick and the mask, they seamlessly tiled together.
I got the different colour bricks by plugging in the R-G and B channels into 2 nodes: Hue shift and Darken Material, then Lerping this with the original brick and plugging in the respective RGB value into each alpha of the lerp, I was able to control each colour mask's selection via these parameters.
This mask effectively acted as a channel packed texture and because it is a mask, I exported it as a 512 in order to keep texture budgets down.
This change is more cosmetic on my end, I thought having stagnant words popping up on screen was quite boring so I changed the UI to follow the player when standing around the object.
I was able to achieve this with help from Matt Aspland's tutorial - https://www.youtube.com/watch?v=tob3GEdMJFc
This helped me get the UI prompt to float above objects - I did this in 'screen space' rather than world space so the prompt followed the player's camera in game.
It gave the level a bit more character and wasn't too obstructive to view the objects on the table. When you look down, you can't see much of the prompt, which gives the audio functions room to breathe.
For clarity, on one of my tables, I used an AI voice cloning tool as I had already asked many people if they would like to do some voice acting for my level, everyone I asked politely declined - but given I had already done 3 voices for my level, it would break immersion if I used my voice too much. So instead I opted for AI voice cloning. The voices I cloned were: Michael Caine, Cillian Murphy and Bobby Cummines using Speechify. As I only wanted to use this as a last result for voices, I thought my reasoning was justified, furthermore, I don't intend on publishing or selling the level once it is finished and under educational space, I feel within my right to do it.
I cloned the voices from the following videos:
Cillain Murphy:https://www.youtube.com/watch?v=-d125tEXBTE
Michael Caine: https://www.youtube.com/watch?v=CuhXv2wBeiQ
Bobby Cummines: https://www.youtube.com/watch?v=i--mhQWTwMs


No comments:
Post a Comment